Make a 3D flythrough video for your GPX (GPS) tracks
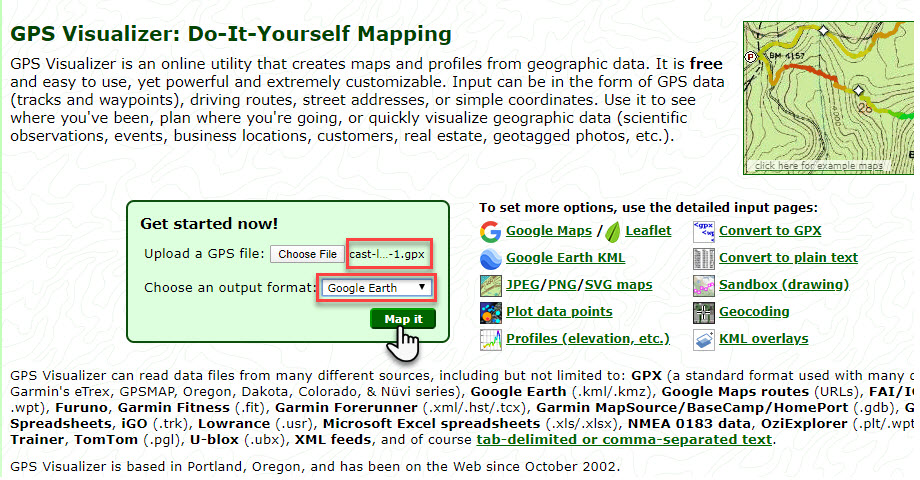
1. Install Google Earth Pro (https://www.google.com/earth/versions/#earth-pro) 2. Download your GPX tracks (I downloaded mine off Gaia, which I had use to track the hike). 3. Optional step: Download and install GPSPrune (https://activityworkshop.net/software/gpsprune/download.html) 4. Optional step: Edit your GPX tracks using GPSPrune, to remove any unwanted side trips, campsites, etc. 5. Upload edited (or non-edited) GPX tracks to GPS Visualizer. Select ‘Google Earth’ as the output, and click ‘Map it’
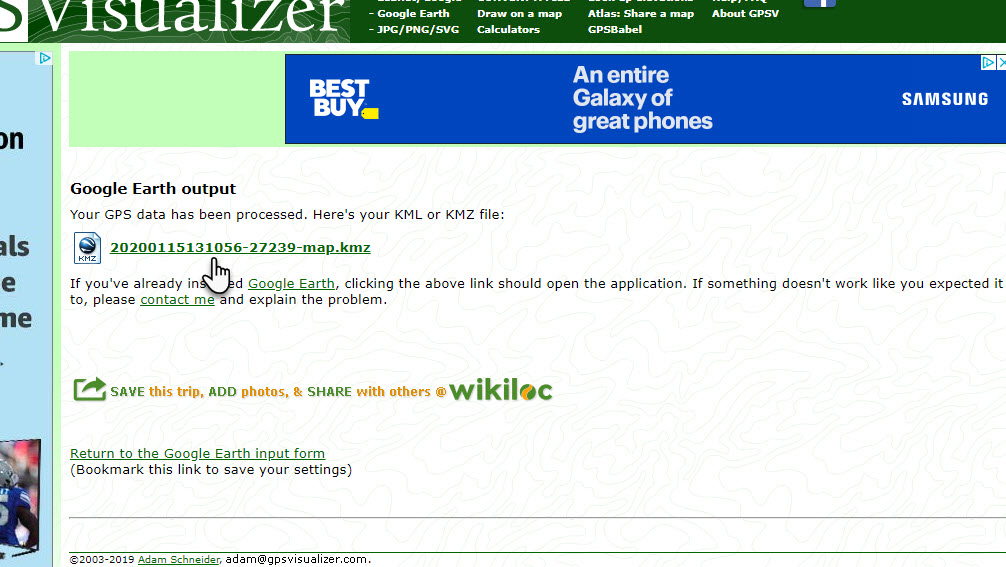
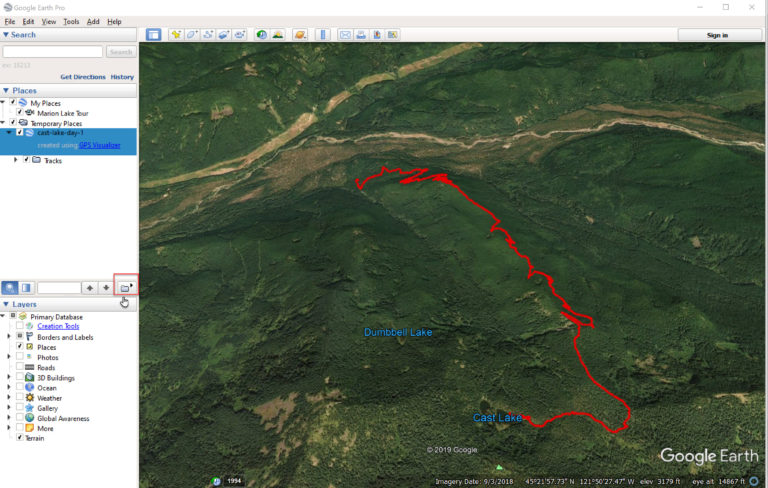
6. Click on the KMZ link in GPS Visualizer, and then click on the downloaded file which is displayed on the bottom of the screen. Google Earth should automatically open and display your tracks.
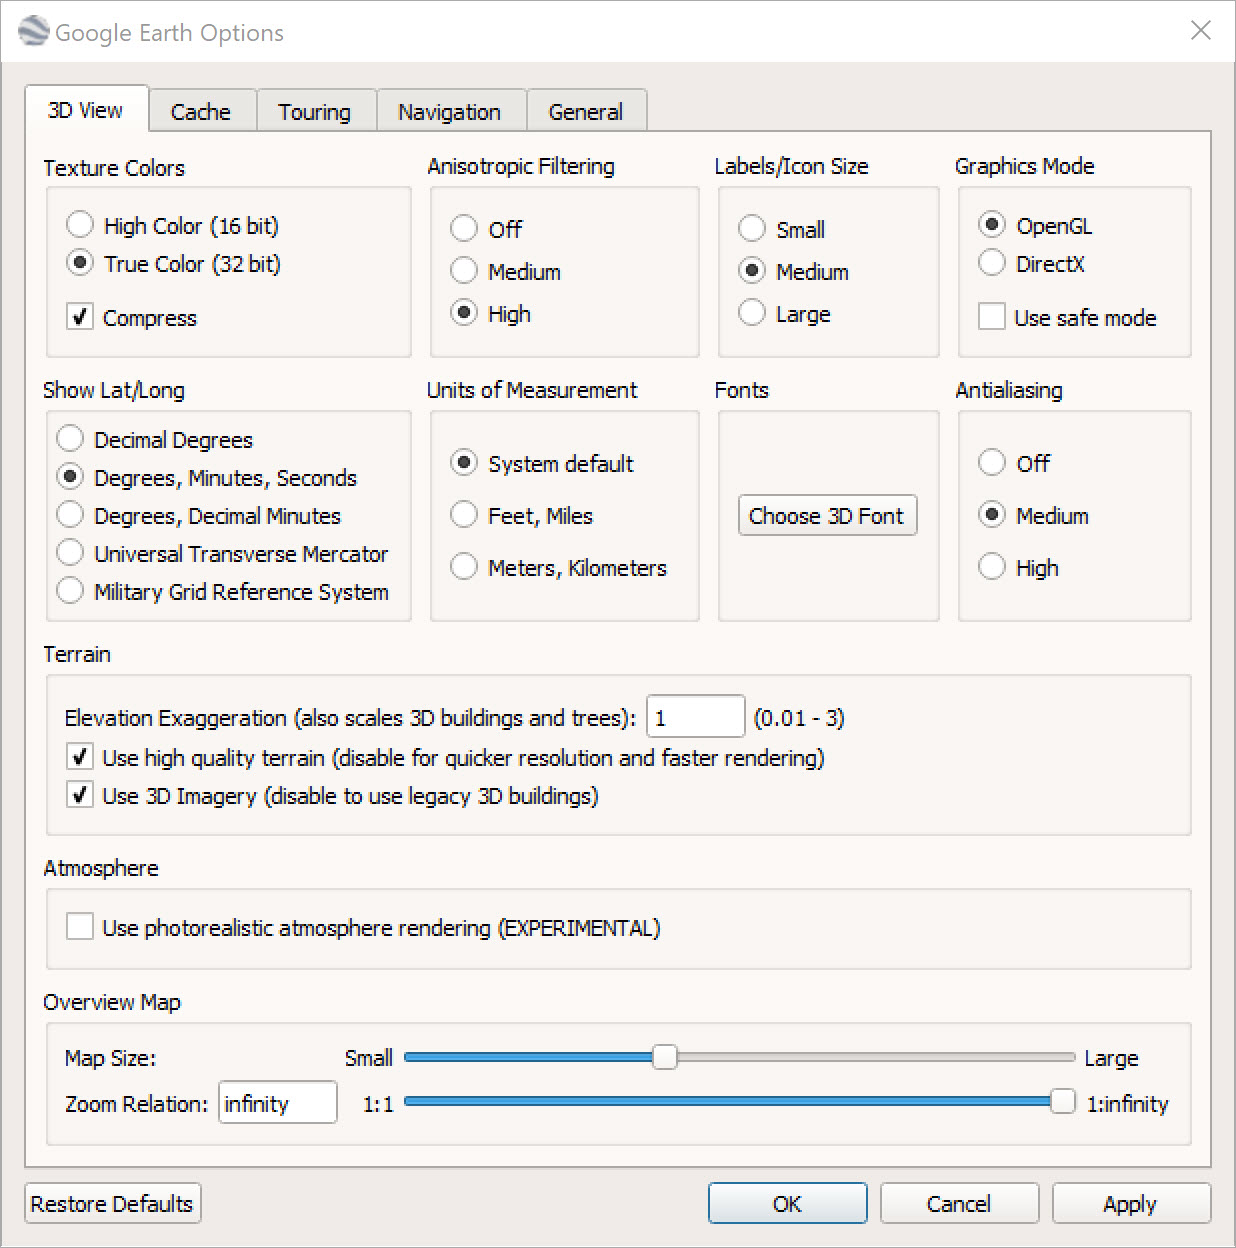
7. Adjust the Google Earth tour settings. Go to Tools > Options 8. The settings I used for the 3D View tab are in the screen shot below.
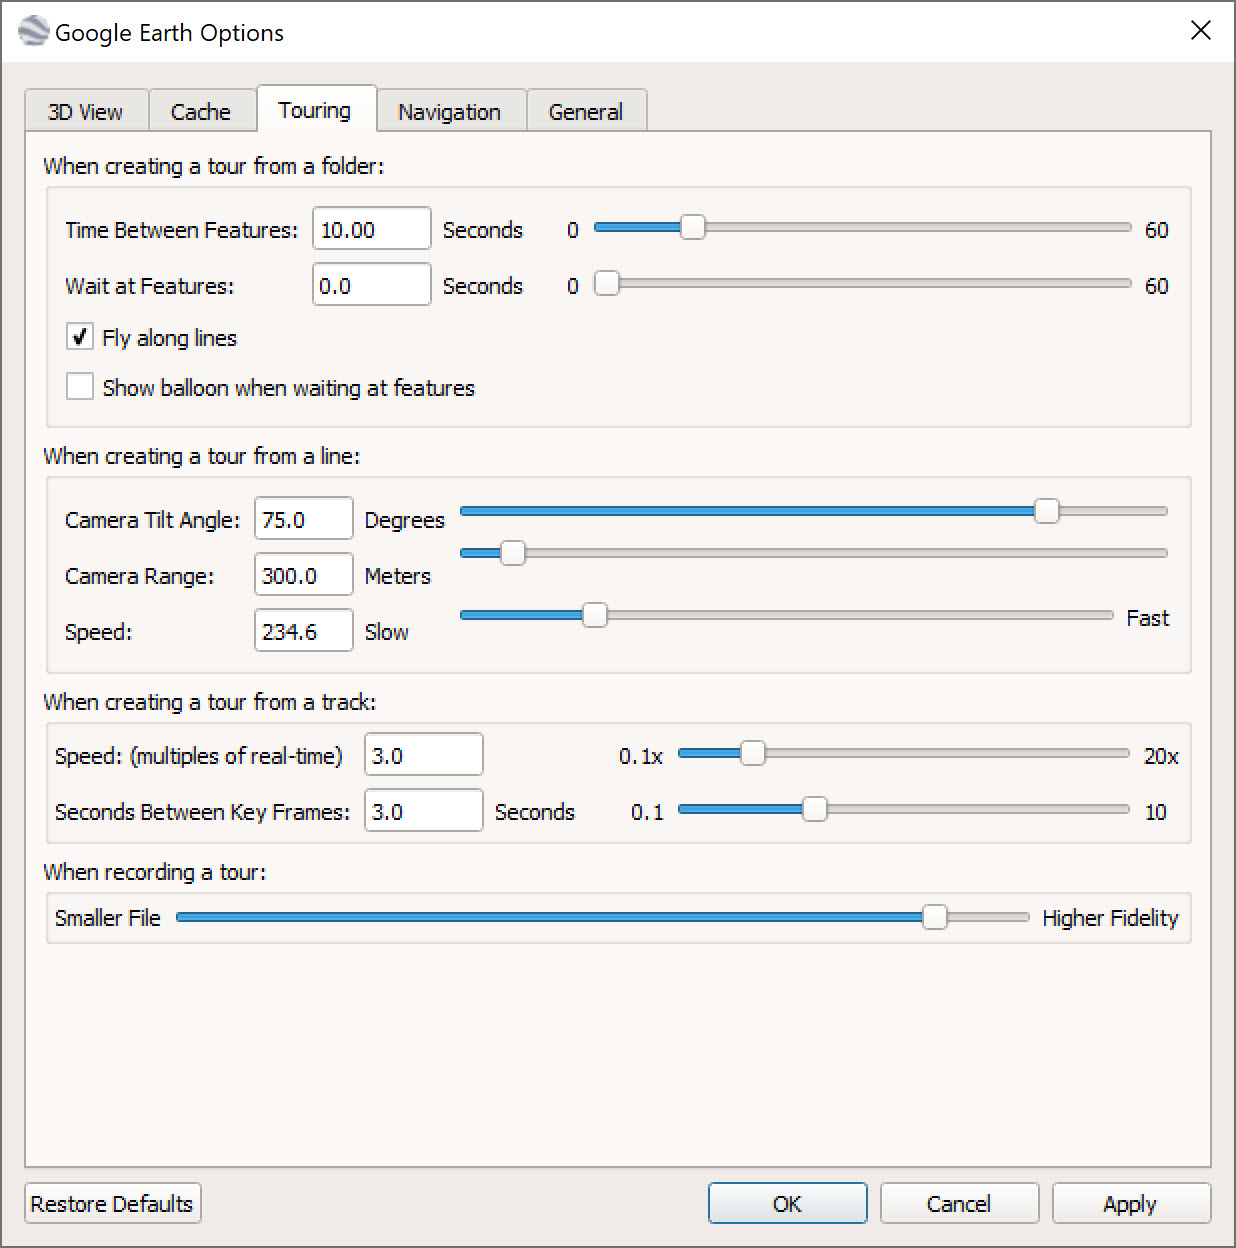
9. I also edited the settings for the Touring tab (camera tilt angle, camera range, speed, and fidelity).
10. Make sure the KML file is in focus and click on the tour folder/play button to test it.
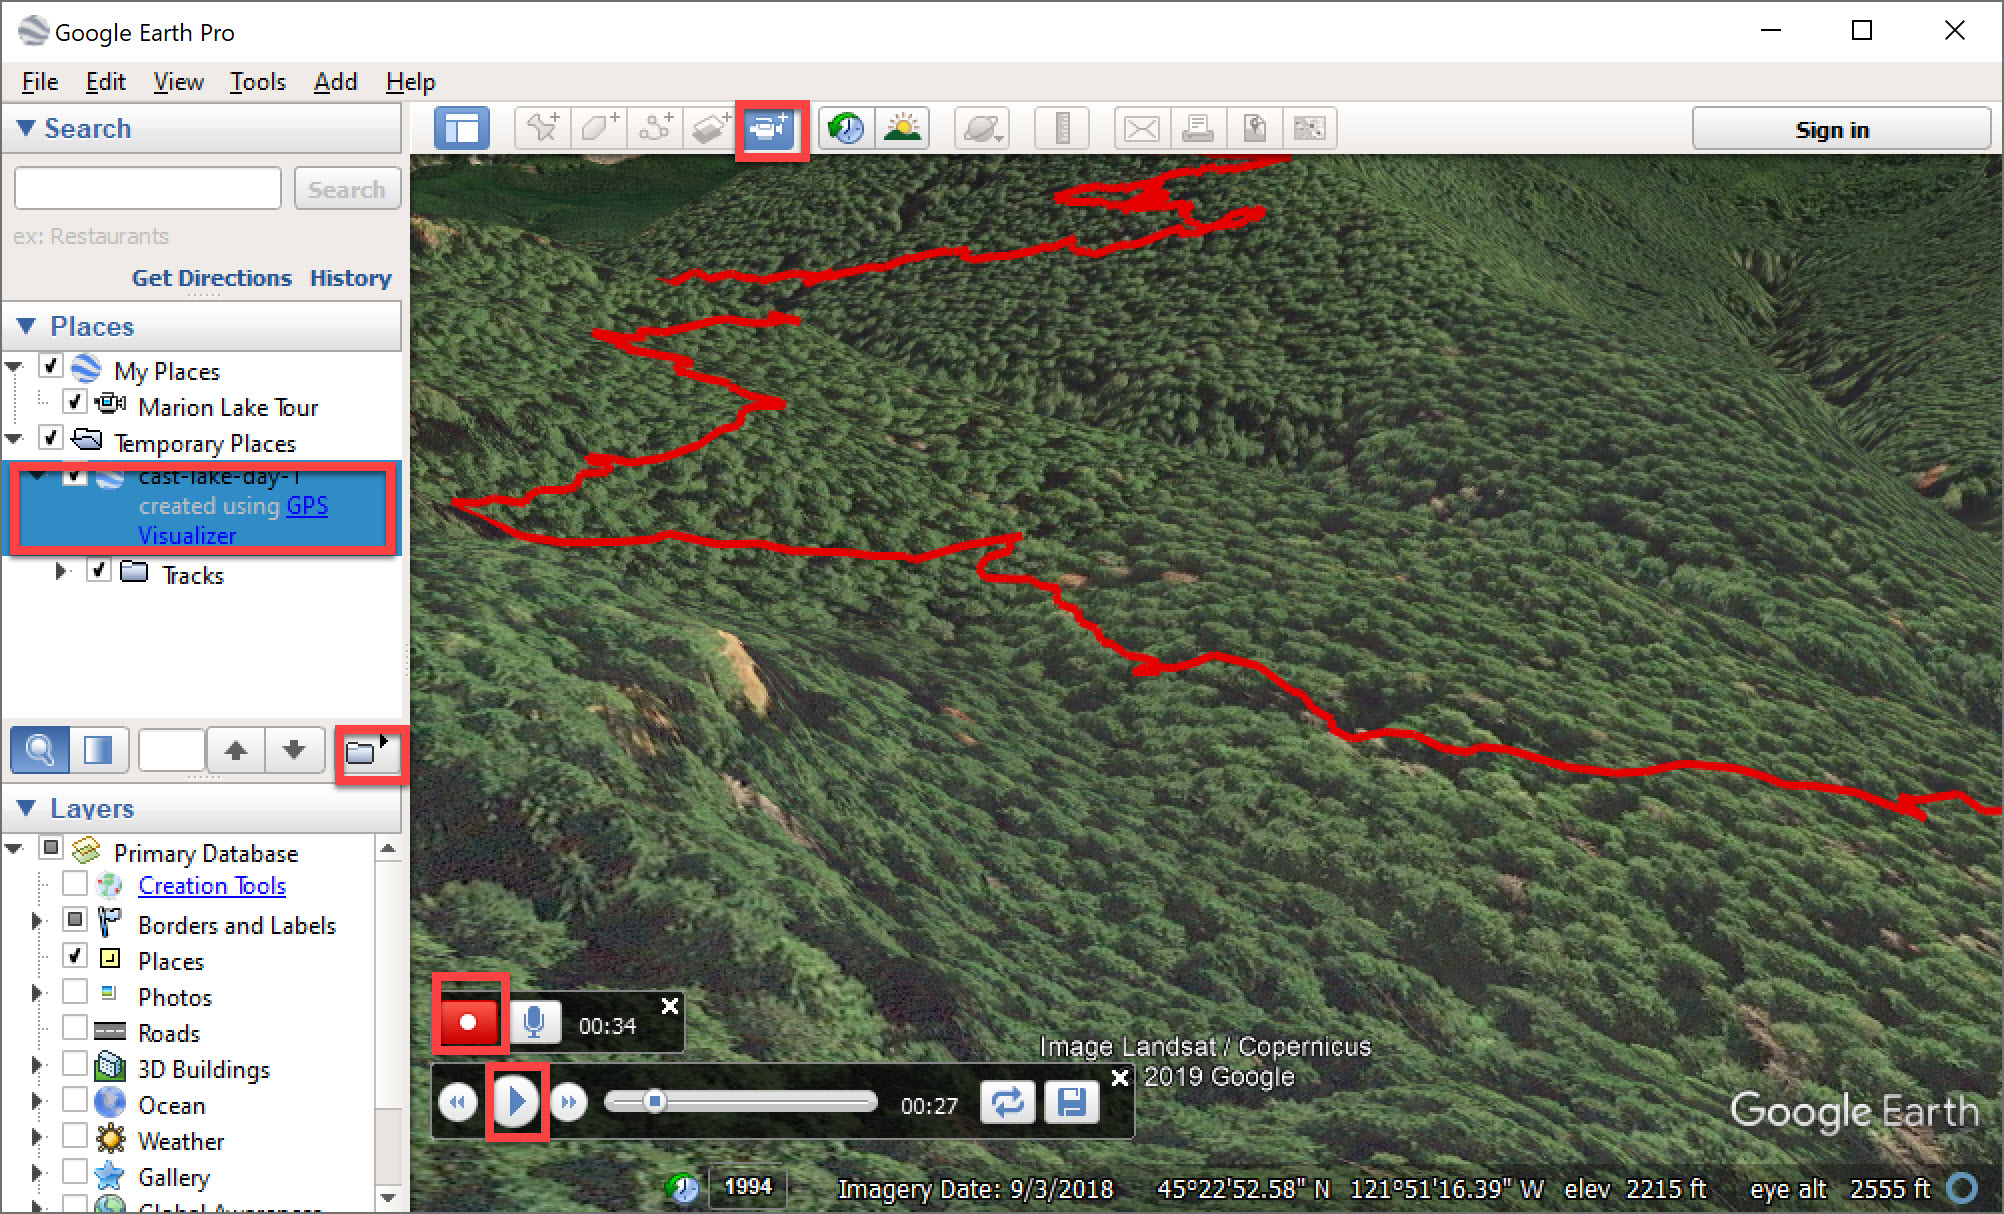
11. Assuming the tour played successfully, you are now ready to record a tour. Click on your KML file/tour in the Places section. 12. Click on the video camera icon (‘Record a tour’) along 13. Click on the play button in the viewing area and click on the record button to record the tour. 14. When the tour is finished, stop the recording and save the tour to My Places.
Google Earth - Record Tour
15. Now make a movie (a lot of steps, I know). Close the tour play controls using the x icon. 16. In the menu, click on Tools > Movie Maker 17. In the Movie Maker dialog box, select the record from ‘A saved tour’ radio button and select your tour from the drop down box. 18. Set the save to destination, video parameters (I used HD 1080p), output configuration (Windows Media .asf), and picture quality (High). 19. Click on ‘Create Movie’. The movie maker will begin recording the movie, very slowly. Most of the glitches/slow downs when you play the tour in Google Earth will be removed from the movie, and it will play much smoother once it’s ready.
Google Earth - Movie Maker
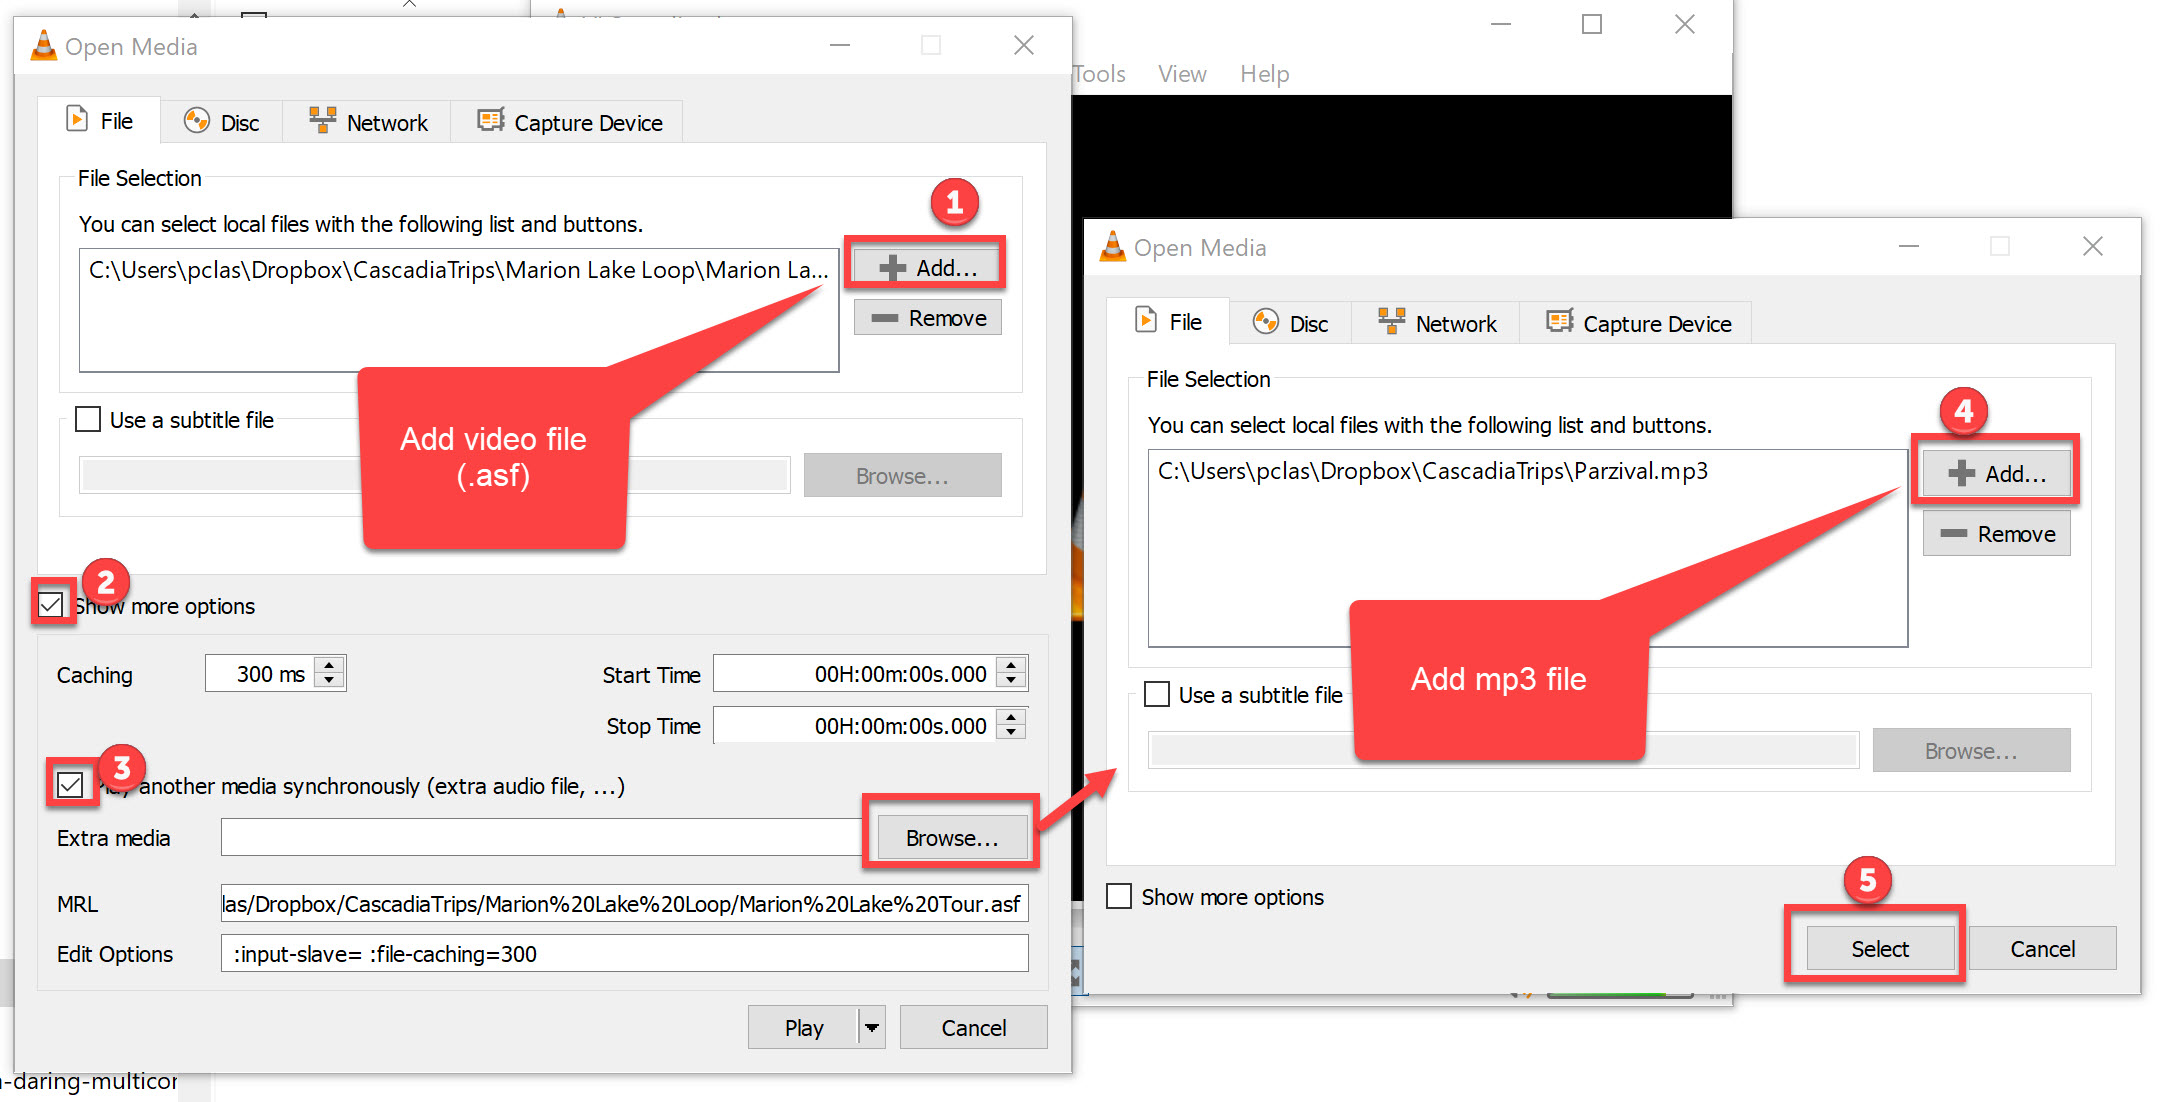
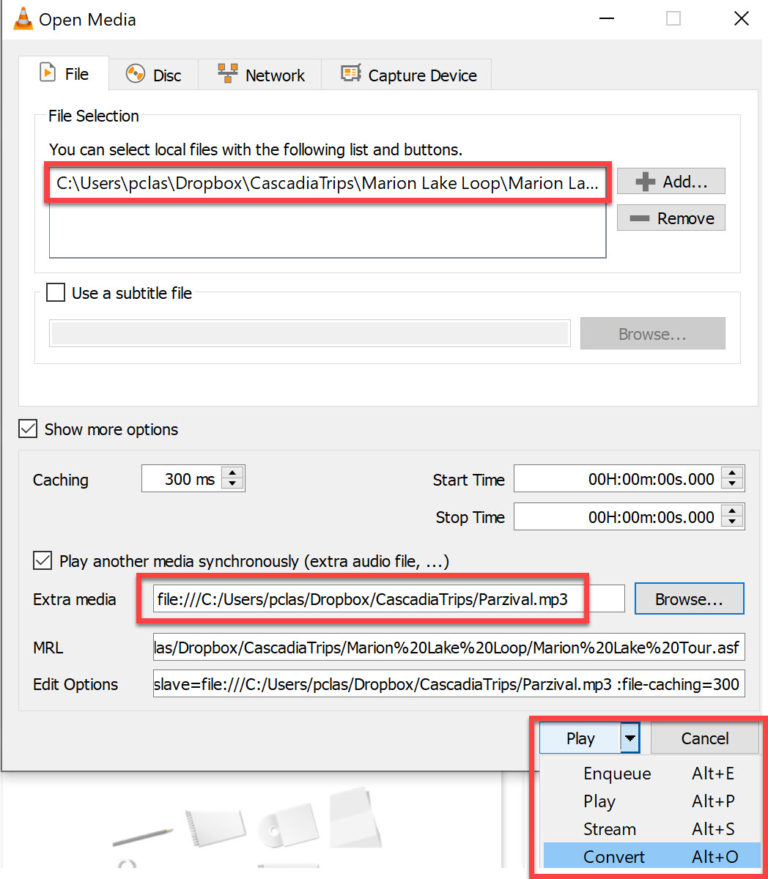
Optional Steps to add music to your movie: 20. Download and install the VLC player (https://www.videolan.org/vlc/). 21. Find an MP3 which is roughly the length of your movie (I found free music on the Youtube audio library – https://www.youtube.com/audiolibrary/music) 22. Open the VLC player 23. Select Media > Open Multiple Files 24. Click on the ‘Add’ button and add your movie .asf file 25. Click on the ‘Show more options’ checkbox 26. Click on the ‘Play another media synchronously’ checkbox 27. Select the ‘Browse’ button and add your MP3. Once you have added it, click on the ‘Select’ button to close the media selection box for the music and return to the original media selection box for your movie.
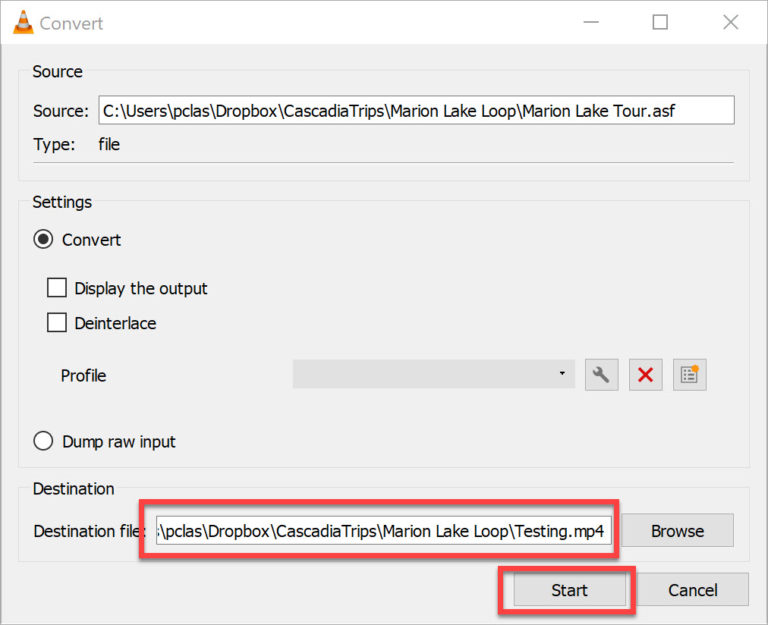
28. Click the ‘Play’ button, on the lower right corner to test out the video with music. If it successfully plays with music, stop the video and select Media > Open Multiple Files (the open media box should still show your two files) 29. In the lower right corner, select the drop down on the ‘Play’ button and select the ‘Convert’ option
29. Select a location to save the new file 30. Click ‘Start’
The conversion process takes awhile (~30 minutes to convert a 4 minute video), so have patience. The final product is saved as an mp4 file by default. If you want a different file format, the Profile drop down, on the Convert screen, has other options, but I didn’t try them.